
This article describes the Three Passes Trek, a 3‑week itinerary around Everest in Nepal’s Khumbu region. Completed in October 2025 without a guide, it consists of a demanding 311 km traverse with 20,000 m of elevation gain, crossing three passes above 5,000 m, two glacier tongues, and including a detour to Everest Base Camp and Kala Patthar, culminating at 5,645 m. Acclimatization was made easier thanks to access and exit via more authentic valleys than the classic Lukla–Everest Base Camp route. The goal is not to provide a turnkey guide, but to share a real field experience to inspire independent hikers.
The itinerary begins with a jeep approach from Kathmandu to Salleri/Phaplu, followed by a gradual entry into the Khumbu region. It then follows the Three Passes Trek, with daily adaptations dictated by the weather, before exiting via the historic route to Jiri, once used by Sir Edmund Hillary and Tenzing Norgay.


Overview
- DAYS 0-1 – Kathmandu
- DAY 2 – Kathmandu to Phaplu
- DAY 3 – Phaplu to Dudh Koshi
- DAY 4 – Dudh Koshi to Surke
- DAY 5 – Surke to Namche Bazaar
- DAY 6 – Namche Bazaar – acclimatization
- DAY 7 – Namche Bazaar to Pangboche
- DAY 8 – Pangboche to Dingboche
- DAY 9 – Dingboche to Chukhung – acclimatization
- DAY 10 – Chukhung to Lobuche via Kongma La
- DAY 11 – Lobuche to Dzonglha via EBC and Kala Patthar
- DAY 12 – Dzonglha to Gokyo via Cho La
- DAY 13 – Gokyo – forced rest
- DAY 14 – Gokyo to Namche Bazaar
- DAYS 15-16 – Namche Bazaar – forced rest
- DAY 17 – Namche Bazaar to Cheplung
- DAY 18 – Cheplung to Nunthala
- DAY 19 – Nunthala to Goyam
- DAY 20 – Goyam to Jiri
- DAY 21 – Jiri to Kathmandu
Table of distances and gradients + GPX
- Getting to the trailhead
- Money
- Insurance
- Budget
- Minimum duration
- Guide
- Internet, electricity and network
- Tea houses
- Permits for the Everest region
- What to pack
- Best season

Itinerary day by day
DAYS 0 & 1 – Kathmandu — preparations
Two nights in Kathmandu to take care of administrative matters, finalize equipment, and organize the rest of the trip. At this stage, I didn’t take time to visit the city. Kathmandu deserves more attention, but the focus was already entirely on the mountains and the imminent departure.

DAY 2 – Kathmandu to Salleri/Phaplu — jeep access
Around twelve hours by jeep to reach Phaplu. The journey is long, slow, and uncomfortable (see getting to the trailhead), but it allows for a much more gradual starting point than Lukla. It’s also an opportunity to meet other hikers, including an Australian who seemed to be following a very similar route to mine and with whom I eventually completed the entire trek. First night in a tea house at Peaceful Lodge, where we were warmly welcomed and enjoyed a hot shower, free internet, and electricity — luxuries that quickly became rare.


DAY 3 – Phaplu (2,500 m) to Dudh Koshi (1,500 m) — start of the trek
24.5 km – 910 m ascent and 1,911 m descent
First real trekking day. The trail crosses lush countryside, between tropical forests, isolated villages, and the first more alpine slopes. Snowy peaks timidly appear in the distance. It was on this day that we discovered the best chips in Nepal, shown in the photo below. If you like spicy food, look no further. Unfortunately, they are not sold above 3,000 m. Our simple theory: due to altitude pressure, the bag would explode. We reached Dudh Koshi shortly after nightfall. The tea house was far from dreamy, and we told ourselves we should have stopped in a village before or after.


DAY 4 – Dudh Koshi to Surke (2,290 m)
20.86 km – 1,651 m ascent and 855 m descent
A demanding stage. Lots of steep staircases, lingering heat, but the altitude remains reasonable. Arrival in Surke, the last village accessible by jeep, not far from Lukla, famous for having the world’s most dangerous airport and for being the main gateway for tourists into Sagarmatha National Park. Built in the 1960s at the initiative of Sir Edmund Hillary, one of the first two climbers to reach the summit of Everest, the runway is said to have been flattened by vigorous traditional Sherpa dances, generously fueled by chang, the local alcohol.


DAY 5 – Surke to Namche Bazaar (3,460 m)
20.56 km – 1,756 m ascent and 587 m descentWe leave the road behind and truly begin the ascent to Namche Bazaar. Jeeps give way to a near‑continuous procession of mules loaded with gas bottles and supplies. They ensure the provisioning of the many tea houses in the Khumbu region and set the tone for what lies ahead.Small planes ferrying hikers to Lukla fly overhead all morning. Very quickly, we join the main route used by most trekkers heading toward Sagarmatha National Park. The crowds increase noticeably, and the density of lodges, restaurants, and cafés becomes almost continuous.Just before Namche Bazaar, we reach the national park entrance. The ranger tells us that nearly 700 tourists entered the park that day alone — a figure that clearly shows the scale of tourism in the region. Permit formalities, mandatory for trekking in the Khumbu, are detailed in the Permits for the Everest region section at the end of the article.


DAY 6 – Namche Bazaar – acclimatization up to Khunde Peak (4,216 m)
12.84 km – 1,047 m ascent and 1,047 m descent
We decided to stay an extra night in Namche to rest a bit and improve our acclimatization. The day begins with a climb to Khunde Peak (4,216 m), followed by a visit to the villages of Khunde and Khumjung. There you’ll find a hospital and a school founded by Sir Edmund Hillary. A temple also houses what is presented as a yeti’s scalp. According to scientific analyses conducted as part of research into the yeti’s existence, it actually belongs to a blue bear — a detail we wisely avoid mentioning on site.
Continuing toward the Everest View Hotel (which, on its own, is a gentler acclimatization walk from Namche Bazaar than the one we chose), the first clear panoramas finally appear: first Lhotse, then the Roof of the World itself — Everest. What was supposed to be a relaxed day ends with us returning to the lodge just before sunset. Rest would have to wait.


DAY 7 – Namche Bazaar to Pangboche (3,950 m)
14.08 km – 1,032 m ascent and 542 m descent
We resume walking toward Pangboche. Mules gradually disappear, replaced by yaks, which are essential for supplying the high‑altitude villages. We arrive fairly early, giving us time to recover a bit.
Along the way, it’s possible to visit Tengboche Monastery, one of the most important spiritual centers in the Khumbu region. Perched at 3,867 m, it offers spectacular views of Ama Dablam, Everest, and Lhotse. Founded in the early 20th century, this Tibetan Buddhist monastery is central to Sherpa religious life. It was destroyed twice — first by an earthquake, then by fire — before being rebuilt in the late 1980s with the help of Sir Edmund Hillary (yes, he’s everywhere).


DAY 8 – Pangboche to Dingboche (4,300 m) + Nangkartshang Peak (5,083 m)
11.24 km – 1,202 m ascent and 837 m descent
A short stage in terms of distance, but enhanced by an acclimatization climb to Nangkartshang Peak at 5,083 m. Once at the top, I realized I had forgotten some belongings in Pangboche, which meant an extra round trip — but also allowed me to admire the south face of Lhotse a little longer.


DAY 9 – Dingboche to Chukhung (4,770 m) + Chukhung Ri (5,546 m)
18.97 km – 1,581 m ascent and 1,108 m descent
The day’s stage is once again short, and we reach the next village before 10 a.m. We take advantage of the time to do two acclimatization hikes. First, we climb Chukhung Ri (5,546 m) to get used to the altitude without heavy packs. Our lungs and heads definitely feel it, but we make it — which boosts our confidence for what’s to come. With some energy left, we also explore toward Island Peak Base Camp, turning back before nightfall.


DAY 10 – Chukhung to Lobuche (4,930 m) via Kongma La (5,535 m)
10.27 km – 925 m ascent and 710 m descent
Time to cross the first of the three passes. The climb is steady, our feet often in the snow, and we quickly find ourselves level with the glaciers. Several high‑altitude lakes dot the landscape, their turquoise reflections contrasting with the mineral surroundings.
We reach Kongma La at 5,535 m. After taking time to catch our breath and enjoy the glacial scenery, we begin the steep and technical descent, where crampons are essential.
The challenge doesn’t end there with the crossing of the Khumbu glacier tongue: unstable moraines, rocky blocks, and small frozen lakes make progress slow and demanding. Fortunately, the route is well marked with small flags. By early afternoon, we arrive in Lobuche. After several unsuccessful attempts to find decent accommodation, we settle for a rather uninspiring and (relatively) expensive tea house — no surprise, since we’ve joined the Everest Base Camp trail.


DAY 11 – Lobuche to Dzonglha (4,874 m) via Everest Base Camp (5,364 m) and Kala Patthar (5,644 m)
26.61 km – 1,222 m ascent and 1,263 m descent
The day starts early, heading for Everest Base Camp. Unsurprisingly, we’re far from alone. This out‑and‑back clearly represents the main goal for many hikers in the region. The trail is lively, groups pass and overtake one another, and we reach Gorak Shep (which looks even less appealing as a place to sleep) among the first.
We then continue alone toward Base Camp, until we find ourselves facing the Khumbu Icefall and glacier — imposing and fascinating.


Back to Gorak Shep for a quick lunch at Buddha Lodge (apparently the only decent place there), before immediately starting the climb to Kala Patthar, the highest point of the trek at 5,645 m. From the top, the view is incredible: Everest, Nuptse, Lhotse, and a sea of snow‑covered peaks as far as the eye can see.


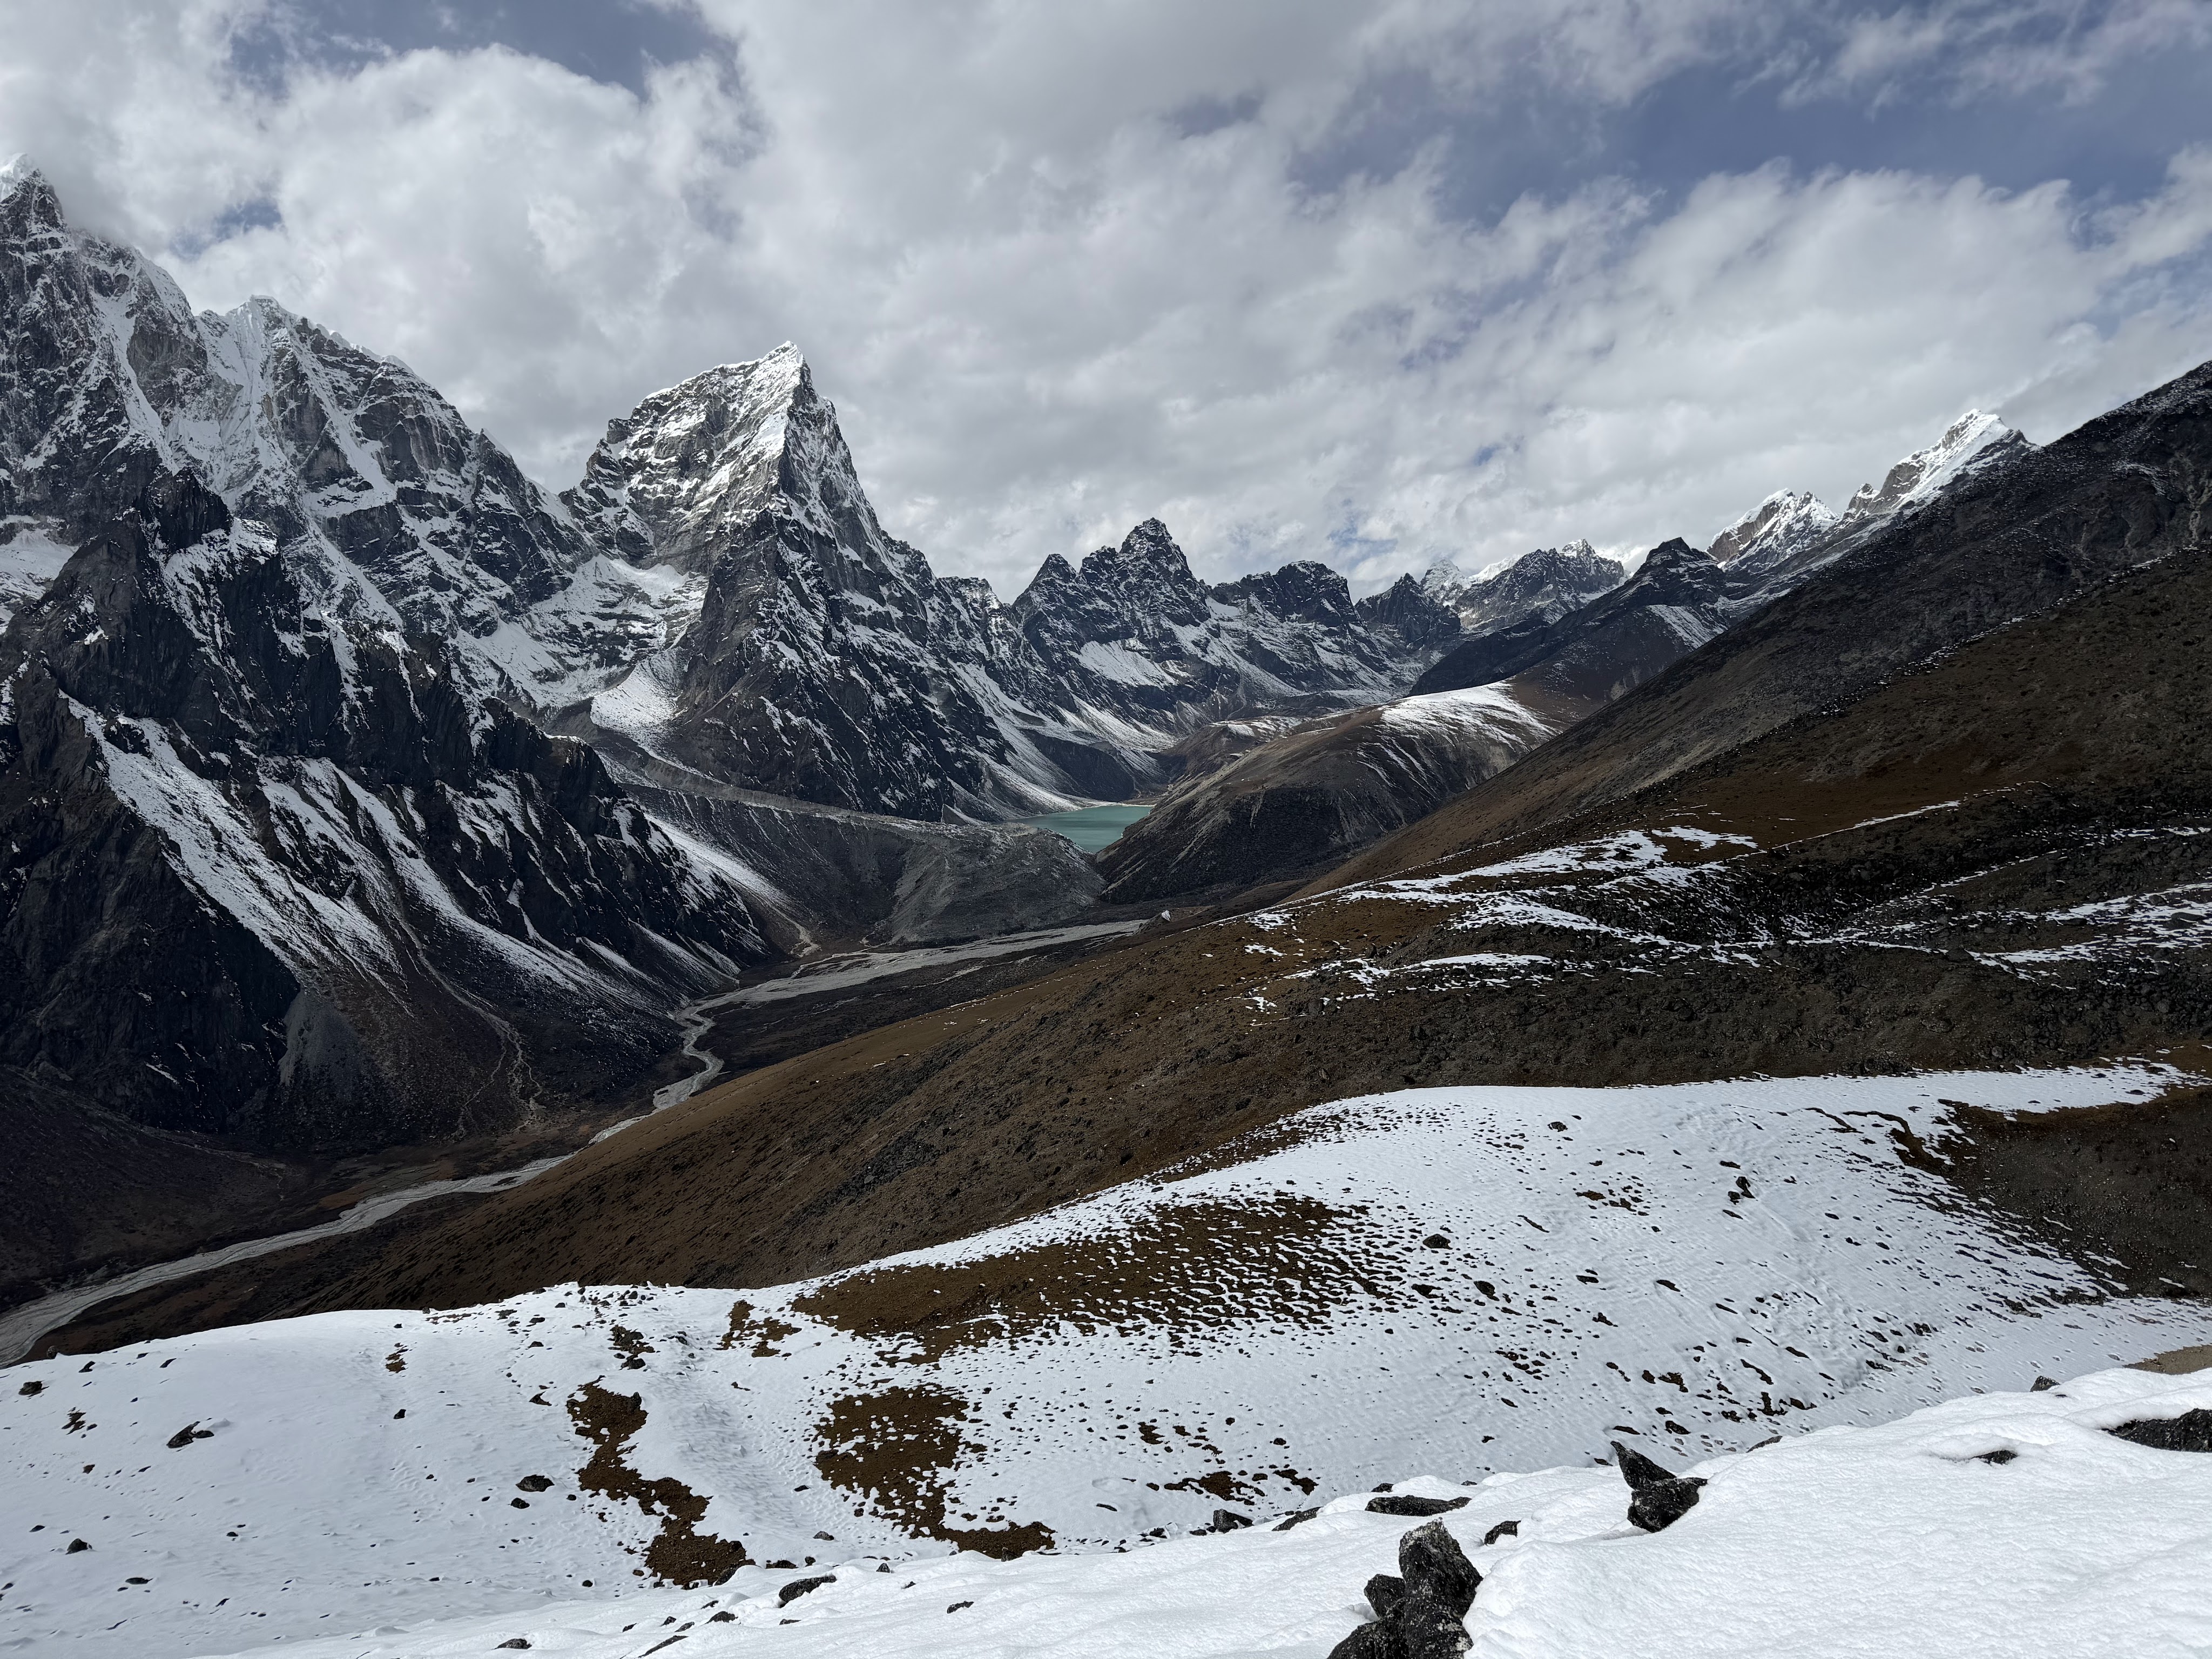
Then comes the long descent. Back to Lobuche, where we have no intention of leaving our packs for even a minute. We grab them and keep going, entering a completely different atmosphere: austere mountains, autumn vegetation, a blue lake, all constantly hidden and revealed by clouds dancing around us. Night falls as Dzonglha finally appears. The first lodge we see looks dreamy from the outside — and the magic continues inside: warm atmosphere, unexpected comfort… a real little Swiss chalet in the heart of the Himalayas. If you pass through, don’t miss Cholatse Guest House.


DAY 12 – Dzonglha to Gokyo (4,790 m) via Cho La (5,420 m)
14.74 km – 963 m ascent and 988 m descent
We start the day with a short round trip to the viewpoint overlooking the lake below — well worth it if the weather is clear.
We then begin the ascent of Cho La, the second pass of our adventure. Lower and with gentler slopes, we reach the top fairly quickly. We overtake a few groups before starting the slower, more technical descent, where crampons are also essential.
We reach Dragnag around noon for lunch, then set off again to cross the glacier — a particularly demanding section. Unlike the first glacier, the paths here aren’t marked, so we decide to follow a guided group to avoid getting lost.
Eventually, we spot the lodges of Gokyo on the shore of the turquoise lake. Without hesitation, we choose what looks like the most comfortable tea house, Gokyo Resort, to recover.


DAY 13 – Gokyo – forced rest
Bad weather and accumulated fatigue force a full rest day. A chance to recover and watch how the conditions evolve.
DAY 14 – Gokyo to Namche Bazaar (3,460 m)
24.38 km – 678 m ascent and 1,970 m descent
Joined by hikers we met in Gokyo, we decide to descend toward Namche the next day to avoid the 1.5 m of snow forecast for the coming days. Well equipped with warm clothes and crampons, we set off on this long return. Luckily, a few walkers had already passed before us, leaving tracks that allowed us to move forward without getting too soaked. Over the hours, snow gradually gives way to mud, and we reach Namche Bazaar with great relief by the end of the day.


DAYS 15 & 16 – Namche Bazaar – forced rest
Two more days of waiting, stuck due to persistent bad weather. These unplanned pauses are a reminder of how important safety margins are on this kind of itinerary. We take the opportunity to check out Namche’s Irish Pub.


DAY 17 – Namche Bazaar to Cheplung (2,725 m)
15.89 km – 497 m ascent and 1,238 m descent
After two days of hibernation, we finally resume the trek.
But after a few kilometers, the rain returns, soaking us to the bone once again. Thankfully, we find shelter in a wood‑heated tea house (not yak‑dung‑heated like in the higher villages). The warmth is comforting and lets us dry off before we take advantage of a break in the rain to continue toward Cheplung.


DAY 18 – Cheplung to Nunthala (2,210 m)
27.46 km – 1,578 m ascent and 1,911 m descent
The clouds gradually give way to clearer skies, revealing the damage caused by the rain on the road. We pass several jeeps cautiously navigating the muddy tracks to bring tourists back to Salleri. After a long day of walking, a good hot shower finally awaits us in Nunthala.


DAY 19 – Nunthala to Goyam (3,210 m)
31.32 km – 2,764 m ascent and 1,756 m descent
We say goodbye to the rest of the group we met in Gokyo, and the Australian and I continue alone, aiming to reach Jiri as quickly as possible by following the route once used by Sir Edmund Hillary to access Everest. Our first target is Thubten Choling Monastery, which takes us off the main trail. Despite the map’s inaccuracies, we eventually reach this unique place — a true monastic village.
We enjoy a dal bhat at the monastery guesthouse and soak in the peaceful atmosphere before continuing toward the charming village of Junbesi. The day ends with the ascent of Lamjura La, which we cross by headlamp, before reaching Goyam and the Tashi Delek guesthouse, where we are extremely well received. We enjoy the best meal of the entire trek there.


DAY 20 – Goyam to Jiri (1,940 m)
34.86 km – 1,893 m ascent and 3,156 m descent
One last push to cover the 35 km separating us from Jiri through beautiful, peaceful villages. Muscles ache, but motivation stays high. We swallow the final kilometers in the dark, exhausted but happy. What an incredible adventure to end this legendary trek.


DAY 21 – Jiri to Kathmandu
We spend the night in a hotel in Jiri that we had spotted in advance and perhaps idealized a bit too much — the reality turns out to be more rustic. No hot shower and no meal other than the eternal mountain dal bhat. Luckily, the bed was comfortable.
At dawn, after a brief moment of panic in front of the closed metal shutter and deserted reception, we finally find the caretaker who lets us out, and we head back to Kathmandu by bus.
Distance & elevation table + GPX
| Day | Start → Finish + GPX(1) | Distance | Elevation |
|---|---|---|---|
| 0-1 | Kathmandu | – | – |
| 2 | Kathmandu → Phaplu | – | – |
| 3 | Phaplu → Dudh Koshi | 24.5 km | +910/-1911 |
| 4 | Dudh Koshi → Surke | 20.9 km | +1651/-855 |
| 5 | Surke → Namche Bazaar | 20.6 km | +1756/-587 |
| 6 | Namche Bazaar – Acclimatization | 12.8 km | +1047/-1047 |
| 7 | Namche Bazaar → Pangboche | 14.1 km | +1032/-542 |
| 8 | Pangboche → Dingboche | 11.2 km | +1202/-837 |
| 9 | Dingboche → Chukhung | 19.0 km | +1581/-1108 |
| 10 | Chukhung → Lobuche | 10.3 km | +925/-710 |
| 11 | Lobuche → Dzonglha | 26.6 km | +1222/-1263 |
| 12 | Dzonglha → Gokyo | 14.7 km | +963/-988 |
| 13 | Gokyo | – | – |
| 14 | Gokyo → Namche Bazaar | 24.4 km | +678/ -1970 |
| 15-16 | Namche Bazaar | – | – |
| 17 | Namche Bazaar → Cheplung | 15.9 km | +497/ -1238 |
| 18 | Cheplung → Nunthala | 27.5 km | +1578/ -1911 |
| 19 | Nunthala → Goyam | 31.3 km | +2764/-1756 |
| 20 | Goyam → Jiri | 34.9 km | +1893/-3156 |
| 21 | Jiri → Kathmandu | – | – |
| TOTAL (full GPX) | 308.6 km | +/-19,700 m |
(1)The GPX tracks mentioned in this article are provided for reference only. They should under no circumstances be followed as an official or safe route. Mountain conditions change constantly and can make a track unsuitable or dangerous.
Practical tips
Getting to the trailhead
Bus: the cheapest option to reach Phaplu or Salleri, with a journey of 10 hours or more depending on road conditions and traffic.
Jeep: shared or private to Salleri (one day) or Surke (two days). Faster than the bus, but also much more uncomfortable, especially on rough tracks.
Plane: flights to Lukla, or more rarely Phaplu. The fastest option, but highly weather‑dependent and prone to cancellations.
Helicopter: an option of last resort, extremely expensive.
Money
ATMs are available up to Namche Bazaar, but it’s safer to withdraw everything in Kathmandu. I didn’t find any free ATMs. The best option I found was Everest Bank, which charged 700 NPR per withdrawal and allowed up to 40,000 NPR. Some were slightly cheaper (400–500 NPR) but only allowed 20,000 or 25,000 NPR. Currency exchange in Thamel remains the easiest solution.
Insurance
It’s essential to check that your insurance covers high‑altitude trekking, helicopter evacuations above certain altitudes, and the real cost of rescues. Some policies explicitly exclude helicopters or cap reimbursements.
Budget
Average budget of around 3,500 NPR per day, without overusing hot showers and paid services. Prices increase with altitude. The budget remained comfortable while eating well and drinking tea without restriction.
Minimum trek duration
Personally, I needed 21 days in total: 1 logistics day in Kathmandu, 2 transport days, 15 days of walking, and 3 weather‑dependent rest days.
However, with a flight approach and by including the final pass not completed in this itinerary, it’s possible — by removing access and exit days beyond Lukla, rest days (in our case due to weather), and severely limiting acclimatization — to follow only these stages: Lukla – Namche Bazaar – Pangboche – Dingboche – Chukhung – Lobuche – Dzonglha – Gokyo – Thame – Lukla, for a total of 9 days of hiking at a sustained pace. This is only feasible if you are already well acclimatized and plan no safety buffer for bad weather.
I still strongly recommend adding at least two acclimatization days and two safety days to deal with weather or flight cancellations. During this trek, planes didn’t fly for three consecutive days.
Starting from Salleri adds at least two days to reach Surke (which I recommend instead of the jeep day). Exiting via Jiri, far more authentic, ideally deserves four days rather than two.
Guide
Used to high‑altitude trekking with proper equipment, including a good GPS, I prefer hiking without a guide. Since a recent law, a guide is theoretically mandatory to enter Sagarmatha National Park. In practice, in 2025, I checked with my hotel in Kathmandu, where I was told I could hike without a guide — and indeed, no checkpoint caused any issues. The only place I would have liked a guide was during the second glacier crossing on Day 12, but by following a guided group, I had no problems.
This remains a personal choice that means taking full responsibility for risk management.
A guide costs around 30 USD per day and is easy to arrange in Kathmandu. It can be useful to meet the guide beforehand to see if you get along and can communicate (many guides have very limited English).
Internet, electricity and network
Everest Link and other satellite services offer Wi‑Fi cards usable in many tea houses for 24 to 48 hours. Speeds are limited and weather‑dependent.
Charging electronic devices is usually paid for at altitude, often per amp or per device, with prices increasing as you go higher. A power bank greatly reduces these costs.
A local SIM card provides coverage up to Pangboche or Dingboche depending on the operator. Namaste generally offers better coverage than Ncell in the Khumbu region.
Tea houses
Tea houses are simple accommodations offering rooms, meals, and sometimes hot showers. They are found in every village along the trek. Sections before Lukla, especially toward Jiri, have fewer tea houses due to lower traffic. Room prices usually assume you eat dinner and breakfast on site; otherwise, a supplement often applies.
Required permits in the Everest region
To legally trek in the Khumbu region and complete the Three Passes Trek, two permits are required.
The first is the Sagarmatha National Park Entry Permit, costing 3,000 NPR for foreign trekkers. This permit supports environmental protection and park management.
The second is the Khumbu Pasang Lhamu Rural Municipality Permit, costing 2,000 NPR if purchased in Kathmandu, or 3,000 NPR at the park entrance. It replaces the old TIMS for this region and directly funds local infrastructure.
Only the second can be bought in Kathmandu, and both can be purchased in Monjo, just before Namche Bazaar. Checks take place at several checkpoints along the route.
What to pack
For this high‑altitude trek, I recommend keeping your backpack to around 10 kg. Ideally, use a layering system: a thermal base layer, a fleece and/or down jacket depending on how cold‑sensitive you are and the season, plus a windproof and waterproof shell. This system makes it easy to adapt to temperature and effort changes. There’s no need to carry too many clothes — a 3‑ to 4‑day rotation, with hand‑washing when the weather allows drying, is more than enough.
In addition to mountain essentials (sun protection, clothing, first‑aid kit, headlamp, etc.), here are my specific recommendations for the Three Passes Trek:
- Crampons / microspikes: essential for crossing the passes and in case of heavy snowfall. Microspikes are sufficient. I used a basic Decathlon model (13 points, 7 mm), effective when moving slowly, although slightly longer points would offer more security. Easy to find in Thamel, Kathmandu.
- Warm sleeping bag: a comfort rating of −6°C and around 1 kg (such as the Cumulus Panyam 600) is sufficient. Tea houses usually provide blankets, whose cleanliness is inversely proportional to altitude, but useful for extra warmth. Some hikers rely only on them, but I prefer not to take that risk. Sleeping bags can also be rented in Kathmandu.
- Water filter: I use a Lifestraw carbon filter. Be careful — it must not freeze, so you need to sleep with it. The Khumbu is relatively clean, but reducing plastic bottle use helps limit waste. You can even help by carrying a sealed trash bag down between Namche Bazaar and Lukla.
- Proper footwear: with soles in good condition. I used Gore‑Tex trail shoes for their lightness, but mid‑height hiking boots offer better snow protection and stability, especially with a heavy pack or if you’re not used to trekking.
- Trekking poles: useful for stability, especially on descents. Personally, I prefer hiking without them and had no issues, though some sections would have been more comfortable with poles.
- Light towel: none of the lodges provide one.
- Power bank: to reduce charging costs at altitude and remain autonomous for several days.
- Snacks: if you’re able to carry a bit more weight, snacks are much cheaper at lower altitude.
Recommended season
- Spring (March to May): generally stable conditions, milder temperatures at altitude, and spectacular rhododendron blooms. On the downside, crowds increase gradually from April onward, and visibility can be slightly reduced by humidity late in the season.
- Autumn (October to November): often very stable weather, exceptional visibility, and ideal conditions for high passes. However, it’s the busiest period, with heavy traffic on classic routes and sometimes limited lodge availability.
Winter is marked by cold and snow on the passes, while summer corresponds to the monsoon, making the trek much more challenging and unpredictable.
Leave a Reply